

How to make resin paperweights?

Here are some steps to help you get started:
Materials needed
- Resin
- Mixing cups and sticks
- Silicone mold
- Embellishments (optional)
Steps
- Prepare your workspace by covering it with a silicone mat, wax paper, or plastic sheeting.
- Choose the object you want to use as the centerpiece of your paperweight. This can be anything from a small figurine to a flower.
- Mix the resin according to the manufacturer's instructions.
- Pour a small amount of resin into the silicone mold, making sure to cover the bottom completely.
- Place the object in the center of the mold.
- Add any embellishments you like, such as glitter or sequins.
- Pour the remaining resin over the object and embellishments, making sure to cover them completely.
- Use a heat gun, hair dryer, or butane torch to remove any bubbles that may have formed.
- Allow the resin to cure according to the manufacturer's instructions.
- Once the resin is cured, remove it from the mold.
- Your resin paperweight is now ready to use!
Variations
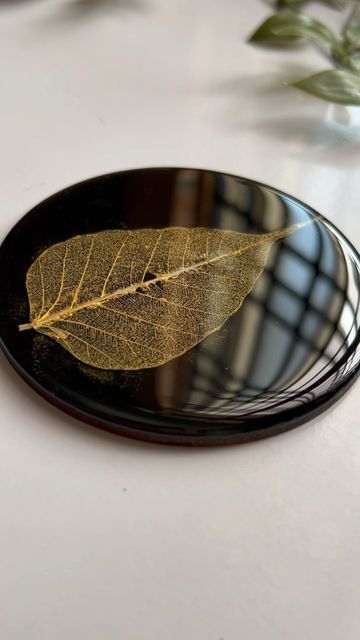
There are many variations you can try when making resin paperweights. Here are a few ideas to get you started:Metal leaf paperweights
If you want to add a touch of elegance to your paperweights, you can try using metal leaf. Here are the steps:- Prepare your workspace by covering it with a silicone mat, wax paper, or plastic sheeting.
- Mix the resin according to the manufacturer's instructions.
- Pour a small amount of resin into the silicone mold, making sure to cover the bottom completely.
- Add a small piece of metal leaf to the resin.
- Pour the remaining resin over the metal leaf, making sure to cover it completely.
- Use a heat gun, hair dryer, or butane torch to remove any bubbles that may have formed.
- Allow the resin to cure according to the manufacturer's instructions.
- Once the resin is cured, remove it from the mold.
- Your metal leaf resin paperweight is now ready to use!

Glitter paperweights
If you want to add a touch of sparkle to your paperweights, you can try using glitter. Here are the steps:- Prepare your workspace by covering it with a silicone mat, wax paper, or plastic sheeting.
- Mix the resin according to the manufacturer's instructions.
- Pour a small amount of resin into the silicone mold, making sure to cover the bottom completely.
- Add a small amount of glitter to the resin.
- Pour the remaining resin over the glitter, making sure to cover it completely.
- Use a heat gun, hair dryer, or butane torch to remove any bubbles that may have formed.
- Allow the resin to cure according to the manufacturer's instructions.
- Once the resin is cured, remove it from the mold.
- Your glitter resin paperweight is now ready to use!


.jpg)


0 Comments